Mono-Blue Terror Deck Tech & Sideboard Guide
.jpg)
Continuing our dedicated Pauper deck techs, today we’re taking a closer look at one of the format’s standout archetypes: Mono Blue Terror. This deck surged in popularity with the release of Dominaria United, thanks to a single creature that completely reshaped the meta—Tolarian Terror.
In this guide, I’ll break down each card in the deck, explaining its role and how it contributes to the strategy. I’ll also go over the sideboard choices, helping you navigate key matchups and maximize your win rate against the current Pauper meta. Whether you're new to the deck or looking to refine your gameplay, this deep dive will give you the insight you need to dominate the battlefield.
Table of Contents
Mono-Blue Terror Pauper Deck Overview


Mono-Blue Terror in Pauper is a control-based deck designed to dominate through powerful creatures and spell interactions while maintaining a strong grip on the game through card advantage and the constant disruption of opponents. Let’s take a look at the cards that make the strategy possible.
Best Card Choices for Mono-Blue Terror in Pauper
The deck relies on the classic blue traits: counterspells, card draw, and overwhelming the board state with powerful and efficient creatures. The synergy between these cards creates a relentless game plan where opponents struggle to gain any traction.
The Creatures
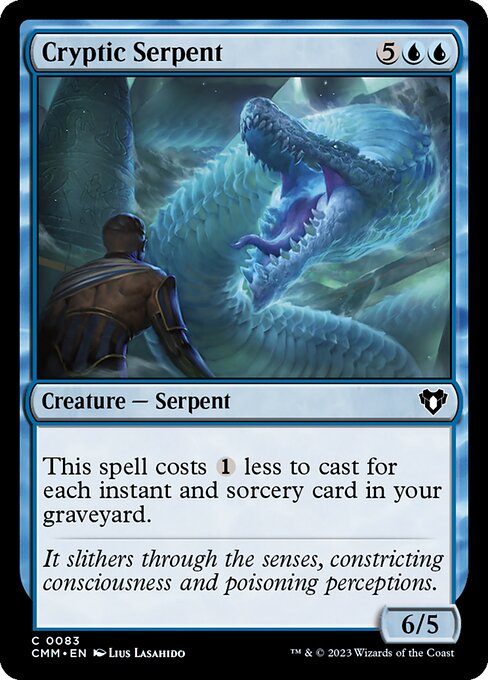
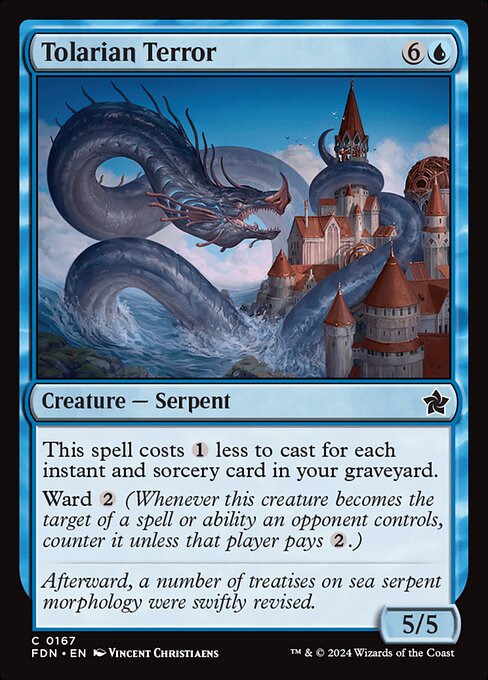
[cards]{{Tolarian Terror}}{{Cryptic Serpent}}[/cards]
Mono-Blue Terror features highly efficient creatures that become more overwhelming as the game progresses. [card]Tolarian Terror[/card] is the deck’s signature creature. Thanks to its cost reduction ability, it becomes significantly cheaper as more instants and sorceries hit your graveyard. With the right setup, you can cast multiple [card]Tolarian Terror[/card]s in a single turn. Its built-in Ward 2 makes it even tougher for opponents to deal with. [card]Cryptic Serpent[/card] follows a similar pattern, benefiting from a stocked graveyard to become a low-cost, high-power threat that can close out games quickly.
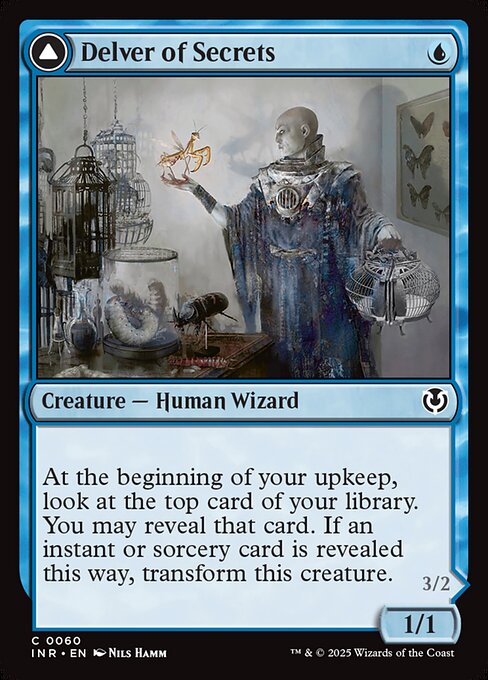
[cards]{{Delver of Secrets}}[/cards]
While these two are your main finishers, [card]Delver of Secrets[/card] plays an important early-game role, transforming into [card]Insectile Aberration[/card] to apply pressure in the air. With its evasiveness and ability to start dealing damage quickly, [card]Delver of Secrets[/card] keeps your opponent on their toes while you set up your bigger threats.
The Cantrips & Card Advantage
Card advantage is a key component of Mono-Blue Terror. Thanks to powerful card-drawing and self-milling spells, the deck excels at keeping your hands full and your options open.
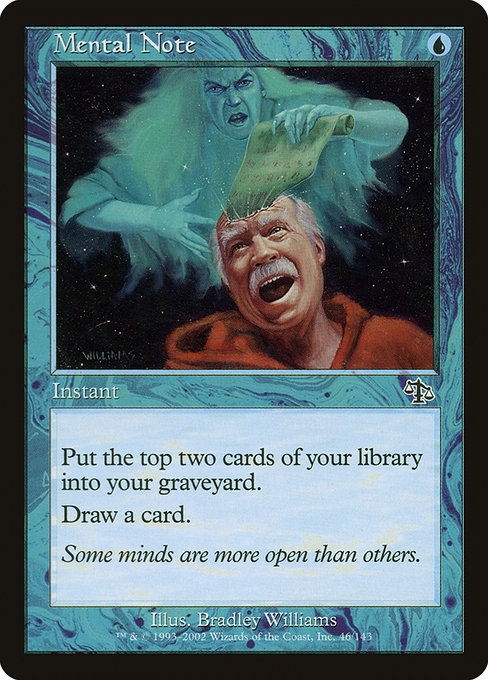
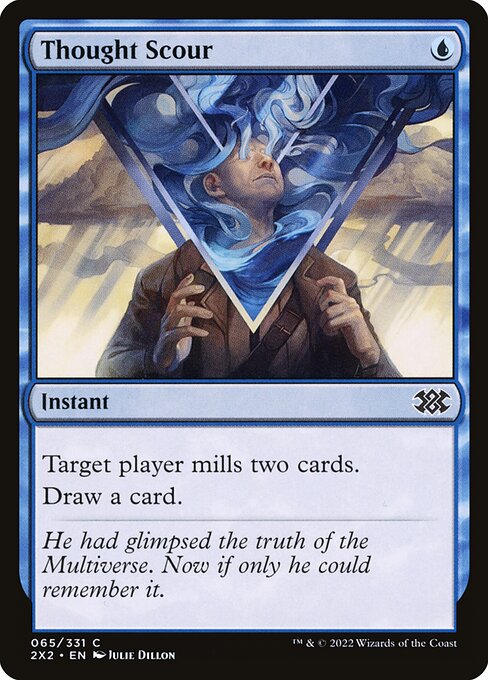
[cards]{{Mental Note}}{{Thought Scour}}[/cards]
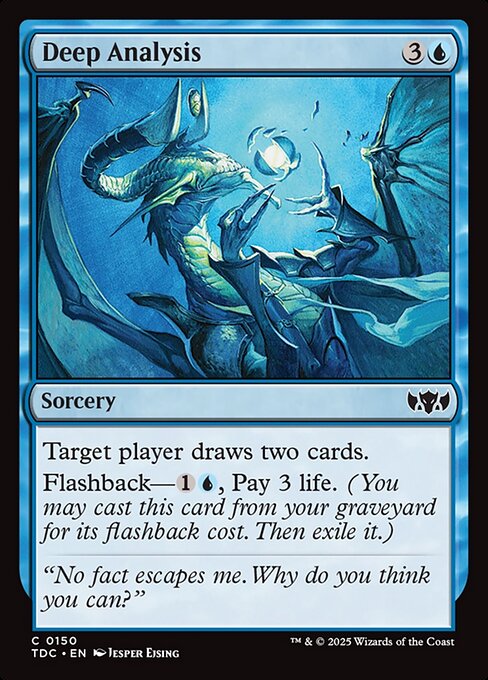
[card]Mental Note[/card] and [card]Thought Scour[/card] are among the best ways to fuel the graveyard while providing card selection. These self-mill cards enable you to trigger the reduction in cost for your big creatures, like [card]Tolarian Terror[/card] and [card]Cryptic Serpent[/card], while also enabling spells like [card]Deep Analysis[/card] to be cast for just two mana, essentially keeping your hand full.
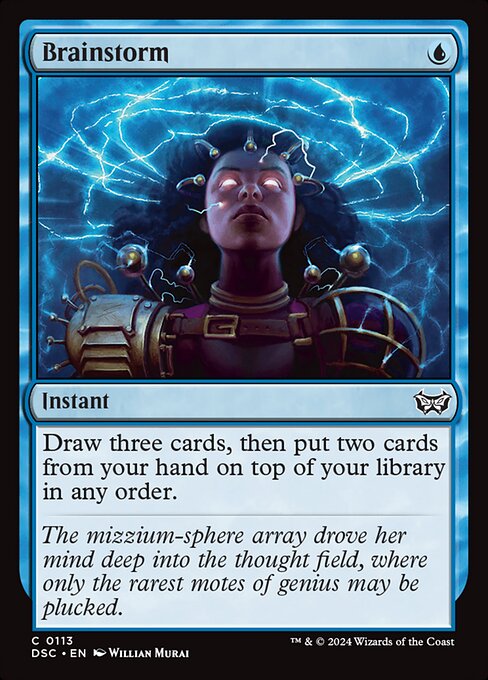
[cards]{{Brainstorm}}{{Ponder}}[/cards]
The deck also relies on [card]Brainstorm[/card] and [card]Ponder[/card] for card selection, both of which work well with [card]Delver of Secrets[/card] by setting up a transformation into [card]Insectile Aberration[/card] on the following turn.
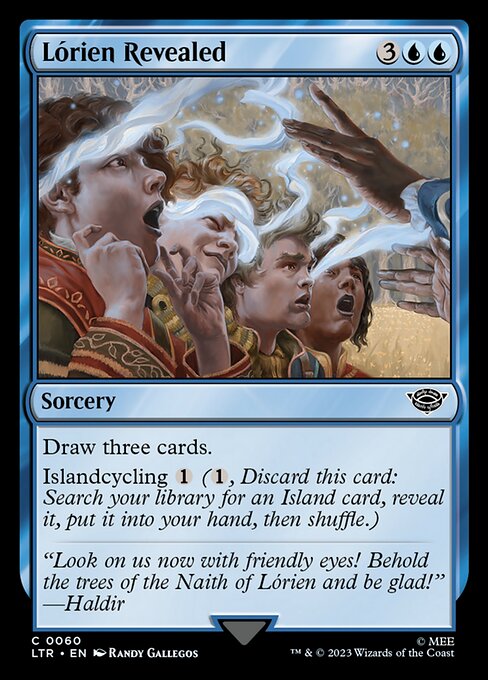
[cards]{{Lorien Revealed}}[/cards]
Last but not least, [card]Lorien Revealed[/card] is a key component of this deck, as it not only reduces the number of lands needed in your deck but also adds to the number of sorceries in your graveyard, helping you cast your big creatures cheaply. In the late game, it becomes one of the most critical cards to keep in hand, as drawing three cards ensures you never run out of resources.
The Interaction Spells
Interaction spells are crucial in Mono-Blue Terror, allowing you to maintain control of the game and disrupt your opponent’s plays.
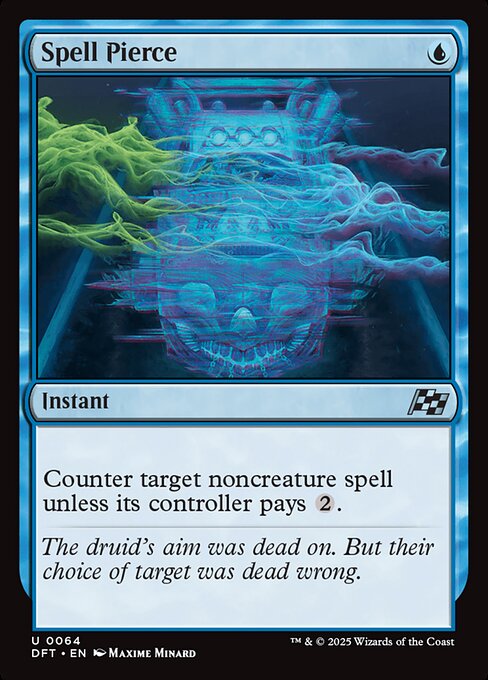
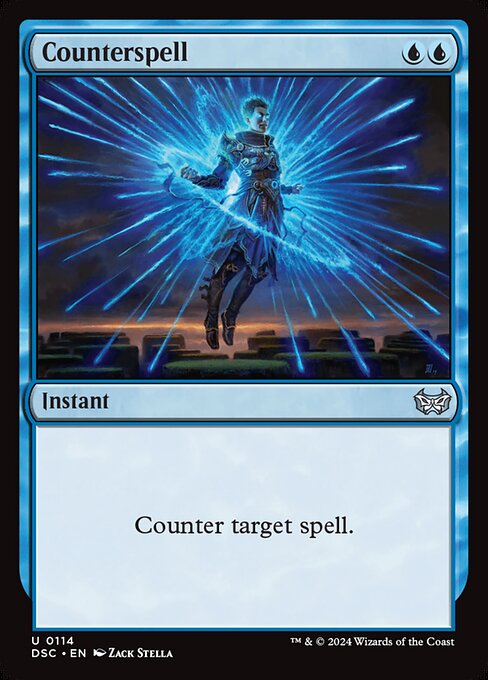
[cards]{{Counterspell}}{{Spell Pierce}}[/cards]
[card]Counterspell[/card] is one of the best in this category, allowing you to counter any spell for just two mana.
Similarly, [card]Spell Pierce[/card] is key in dealing with early setup cards from your opponents, such as [card]Experimental Synthesizer[/card], [card]Ichor Wellspring[/card], and [card]Utopia Sprawl[/card], to name just a few. Against decks that run very low land counts and a high density of non-creature spells, such as Bogles, it can often act as an unconditional counterspell for just one mana.
[cards]{{Boomerang}}[/cards]
[card]Boomerang[/card] is another valuable spell, bouncing any permanent—including lands—back to its owner’s hand and slowing your opponent’s progress. While you can run [card]Snap[/card] as well, there’s no better feeling than bouncing an opponent’s indestructible bridge when they are targeting it with [card]Cleansing Wildfire[/card].
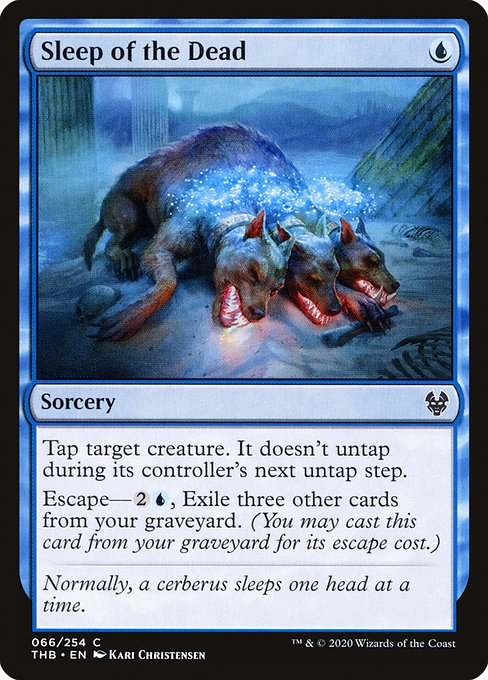
[cards]{{Artful Dodge}}{{Sleep of the Dead}}[/cards]
Other useful spells include [card]Artful Dodge[/card] and [card]Sleep of the Dead[/card], both of which help your big creatures deal massive amounts of damage. These two fit perfectly into the strategy, as both have graveyard-related abilities—flashback and escape, respectively.
This combination of spells ensures that you can deal with threats before they become a problem while maintaining the tempo of the game in your favor.
Optimizing Your Mono-Blue Terror Sideboard
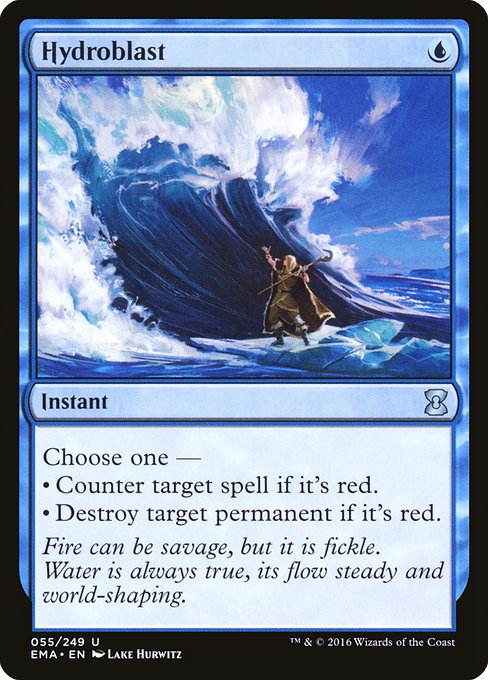
[cards]{{Hydroblast}}{{Blue Elemental Blast}}[/cards]
[card]Hydroblast[/card] is a versatile tool in Mono-Blue Terror, so running up to eight copies of it is a must-have and the number of copies increases based on how popular red-based strategies are, or how strong red is in the format.
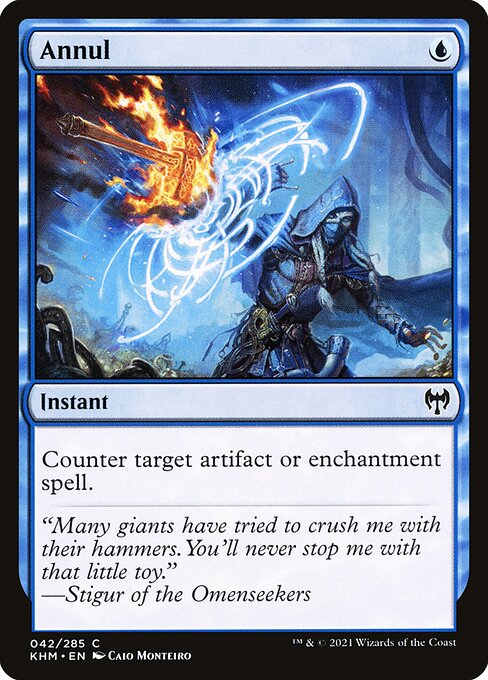
[cards]{{Annul}}[/cards]
[card]Annul[/card] is a one-mana counterspell that specifically targets artifacts or enchantments, making it invaluable against decks like Boggles and Affinity, but can be situationally used against the likes of Boros Synthesizer to counter [card]Lembas[/card] or [card]Makeshift Munitions[/card].
[cards]{{Murmuring Mystic}}[/cards]
[card]Murmuring Mystic[/card] shines in matchups where you need to generate value from your spellcasting as its ability can quickly fill the board with evasive creatures, which is especially useful in slower matchups or against decks that might not have a fast way to deal with flying creatures. The Mystic provides creature tokens to keep the pressure on and synergizes well with your spell-heavy strategy, creating more value as you cast your spells. At worst, it's a hard body to get through.
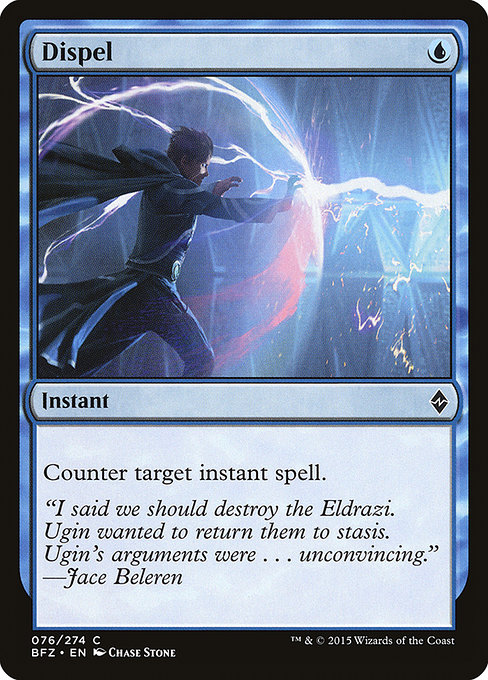
[cards]{{Dispel}}[/cards]
[card]Dispel[/card] is a cheap one-mana counterspell that specifically targets instants, making it ideal in Pauper to counter spells from control or combo spell-heavy decks. Whether stopping an opponent’s key removal spell or disrupting their counterplay, [card]Dispel[/card] ensures that you can always protect your game plan, especially in matchups where quick interactions are crucial.
[cards]{{Sleep of the Dead}}[/cards]
[card]Sleep of the Dead[/card] is a solid tempo play against aggro and midrange decks, especially those relying on creatures like [card]Writhing Chrysalis[/card] to apply pressure. It helps buy time by locking down an opponent’s most threatening creature, giving you a chance to stabilize and take control of the game.
[cards]{{Curfew}}[/cards]
[card]Curfew[/card] is a powerful tool in Pauper against Boggles and Mono-White Heroic. Since these decks stack a ton of enchantments on a single creature—often with Hexproof or protection effects—having a way to bounce them without targeting is crucial. [card]Curfew[/card] effectively disrupts their game plan, forcing them to start over while you maintain control.
Tips and Tricks for Playing Mono-Blue Terror in Pauper
Knowing when to be aggressive is crucial. Once you have the advantage, don’t hesitate to push forward. Both [card]Delver of Secrets[/card] and [card]Tolarian Terror[/card] can close out games quickly if left unanswered, so recognizing when to apply pressure is key.
When playing [card]Delver of Secrets[/card], remember that you can cast [card]Brainstorm[/card] at the beginning of your upkeep to rearrange the top of your library before [card]Delver of Secrets[/card]’s ability resolves. This allows you to set up a guaranteed transformation into [card]Insectile Aberration[/card], ensuring early-game aggression.
[card]Thought Scour[/card] and [card]Mental Note[/card] are essential not only for fueling your graveyard but also for improving card quality. Along with [card]Brainstorm[/card], they help get rid of unwanted cards, such as excess lands in the late game, while also enabling graveyard-based effects like [card]Deep Analysis[/card] and [card]Sleep of the Dead[/card]. Similarly, pairing [card]Brainstorm[/card] with [card]Lorien Revealed[/card] allows you to shuffle away unwanted cards by cycling the latter, ensuring you always have useful options in hand.
There’s a common saying that "the best [card]Brainstorm[/card] is the one that is never cast." This highlights the card’s importance and the need for patience when using it. You should only cast [card]Brainstorm[/card] when you are actively searching for a key piece or setting up a specific play—using it recklessly can be a waste of its potental.
When protecting [card]Tolarian Terror[/card], always let your opponent pay the Ward 2 cost before responding with a counterspell or disruption. This forces them to commit their mana first, limiting their options and increasing the value of spells like [card]Spell Pierce[/card]. Proper sequencing can make the difference between saving your threat and losing it unnecessarily.
Mono-Blue Terror Pauper Sideboard Guide: Matchups & Strategies
The following are suggestions on how to approach games with the deck, though they clearly reflect my own preferences based on my personal experience with the deck, so you’ll notice some different recommendations here than what you might be used to.
Mono Red Aggro
IN: 3 [card]Blue Elemental Blast[/card], 3 [card]Hydroblast[/card]
OUT: 4 [card]Boomerang[/card], 2 [card]Deep Analysis[/card]
Since there’s no way to gain life in blue against Mono Red, we cut all [card]Deep Analysis[/card], as they will be too expensive to hard-cast, and we add the necessary anti-red interaction.
Gruul Ramp
IN: 2 [card]Blue Elemental Blast[/card], 1 [card]Sleep of the Dead[/card]
OUT: 2 [card]Artful Dodge[/card], 1 [card]Ponder[/card]
One of the best tricks against Gruul Ramp is bouncing their enchanted [card]Forest[/card] when they try to untap it with [card]Arbor Elf[/card]. Other than that, we add an extra [card]Sleep of the Dead[/card] to tap reach creatures and a couple of Hydroblast effects to counter their anti-blue hate, such as [card]Pyroblast[/card].
Grixis Affinity
IN: 3 [card]Annul[/card], 1 [card]Dispel[/card], 2 [card]Blue Elemental Blast[/card]
OUT: 2 [card]Artful Dodge[/card], 2 [card]Deep Analysis[/card], 1 [card]Sleep of the Dead[/card], 1 [card]Ponder[/card]
This match can be tough. Ultimately, this is a battle of attrition. They will likely keep [card]Krark-Clan Shaman[/card] alongside [card]Toxin Analysis[/card] to clear your board, making [card]Hydroblast[/card] key—not just for stopping this but also for countering their [card]Pyroblast[/card].
Dimir Faeries
IN: 2 [card]Murmuring Mystic[/card], 2 [card]Dispel[/card]
OUT: 2 [card]Artful Dodge[/card], 1 [card]Sleep of the Dead[/card], 1 [card]Boomerang[/card]
If you manage to resolve [card]Murmuring Mystic[/card] and protect it against Dimir Faeries, your opponent will struggle to win. This acts as a backup plan since they will likely try to disrupt your graveyard with dedicated hate. The cards we cut are those that are least effective against their deck.
Wrap Up
Mono Blue Terror is a deck that thrives on careful sequencing and smart decision-making. With practice, it becomes one of the most rewarding decks in Pauper, letting you outvalue your opponents and apply relentless pressure while keeping interaction ready.
Thanks for reading, and good luck piloting Mono Blue Terror to victory! 🚀
If you’d like to support the blog and my YouTube channel, you can do so for just $1 a month on Ko-fi or through YouTube memberships. That gets you access to our Discord community and behind-the-scenes content — and it helps me keep creating more Pauper content for you all.
My Favorite Pauper Setup
Here are some of my favorite MTG products for Pauper—stuff I’ve tried, loved, and think you'll find super useful too.


The Amazon links use affiliate codes that help support future content if you grab something.

.jpg)
.jpg)
.png)
.webp)
.png)
.webp)
.jpg)
Hi. You told me about my list from the tournament. I don't agree with your decisions in some matchups.
ReplyDeleteIf you want, I'll tell you, as a player, what I changed.