Pauper Living End Deck Tech & Sideboard Guide

If you’ve ever wanted to drop a giant threat on turn two without spending seven or eight mana, you’re going to love this. Pauper Living End is a graveyard-based deck focused on cheating threats into play as early as turn two. Instead of playing creatures the normal way, it fills the graveyard fast and brings them back even faster, completely flipping the script on how early-game turns usually play out in Pauper. It’s explosive, it’s tricky, and when it works, it feels downright unfair (in the best way possible). Let’s break down how the deck pulls it off and why it’s catching so many players off guard.
Table of Contents
Living End Pauper Deck Overview


At first glance, this deck might look like a pile of uncastable creatures and strange spells—but once you see it in action, everything clicks. Instead of playing small creatures or controlling the board, this deck takes a different route: it discards or cycles huge creatures early, then uses clever mechanics to reanimate them way ahead of schedule. The pieces are all chosen to avoid cheap spells entirely, allowing for a consistent combo setup that feels inevitable once the engine starts rolling. It’s not your typical Pauper deck—and that’s exactly what makes it so exciting.
The Creatures
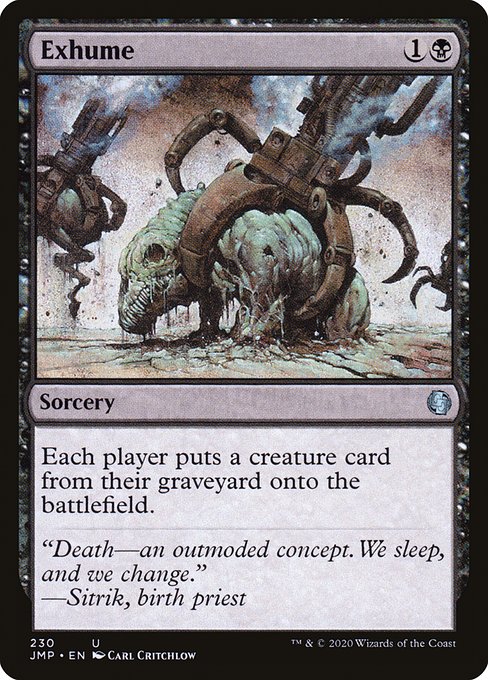
This deck runs a suite of massive creatures that are nearly impossible to cast fairly in Pauper—but that’s the point. These beaters are meant to hit the graveyard early and return to the battlefield for free with [card]Exhume[/card].
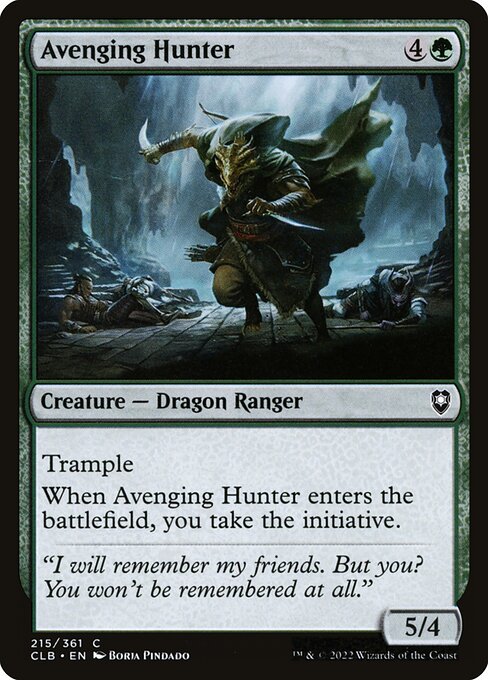
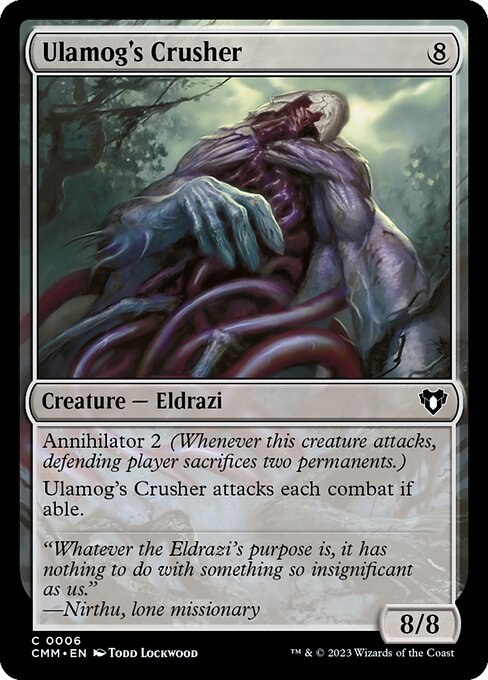
[cards]{{Ulamog's Crusher}}{{Avenging Hunter}}[/cards]
[card]Ulamog's Crusher[/card] is the most devastating, bringing an 8/8 body with annihilator 2, forcing your opponent to sacrifice two permanents every time it attacks.
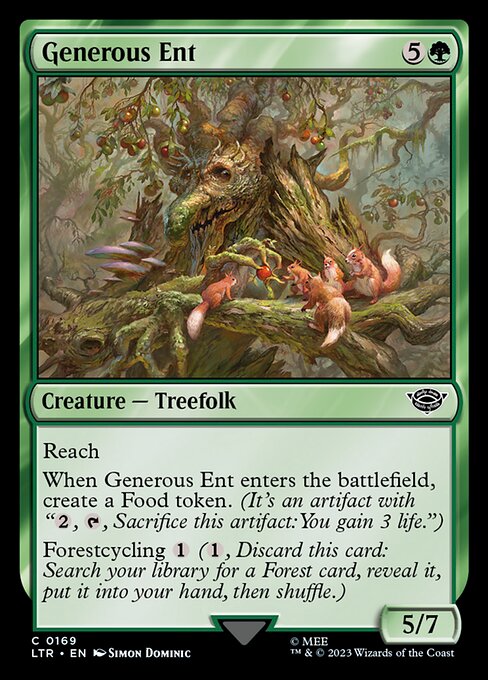
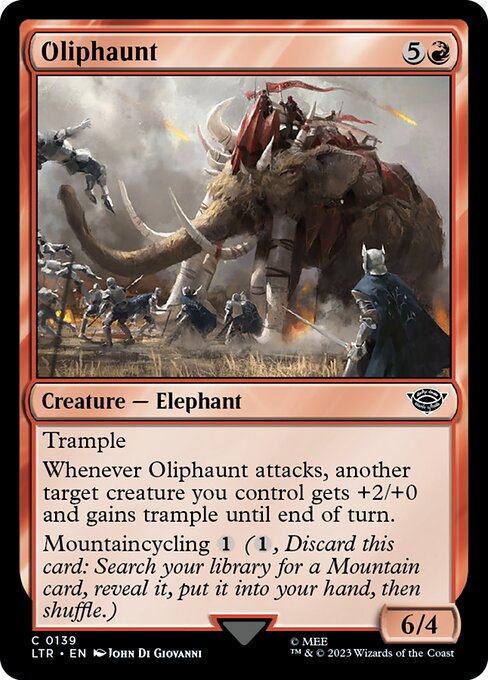
[cards]{{Generous Ent}}{{Troll of Khazad-dûm}}{{Oliphaunt}}[/cards]
Alongside it, [card]Generous Ent[/card], [card]Troll of Khazad-dûm[/card] and [card]Oliphaunt[/card] offer huge power with cycling that lets you fill your graveyard while fixing your mana. [card]Avenging Hunter[/card] rounds out the top end, providing the Initiative as a second go-to discard target.
The Enablers
What makes this deck tick are the cards that let you set up your graveyard and cheat these monsters into play. [card]Exhume[/card] is the linchpin: a two-mana reanimation spell that brings back the best creature in each graveyard.
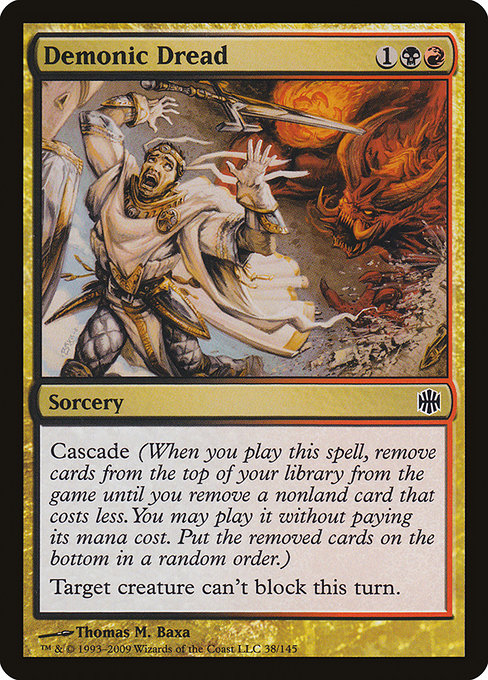
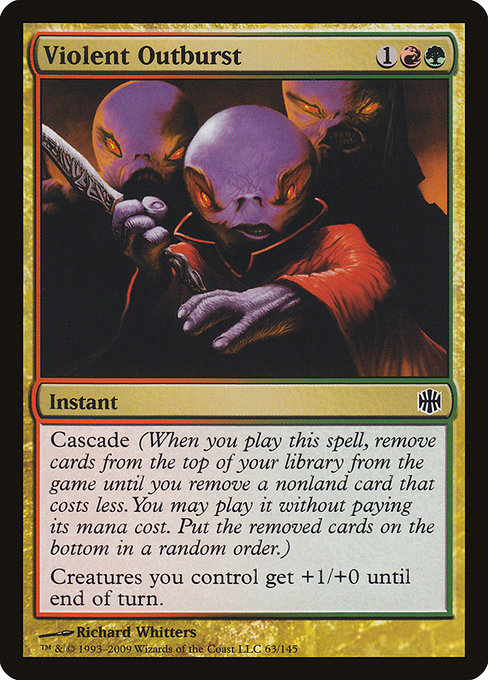
[cards]{{Violent Outburst}}{{Demonic Dread}}{{Exhume}}[/cards]
To reliably hit it with cascade, the deck runs exactly two cascade spells—[card]Demonic Dread[/card] and [card]Violent Outburst[/card]—both of which cost three and always find [card]Exhume[/card] because nothing in the deck costs less.
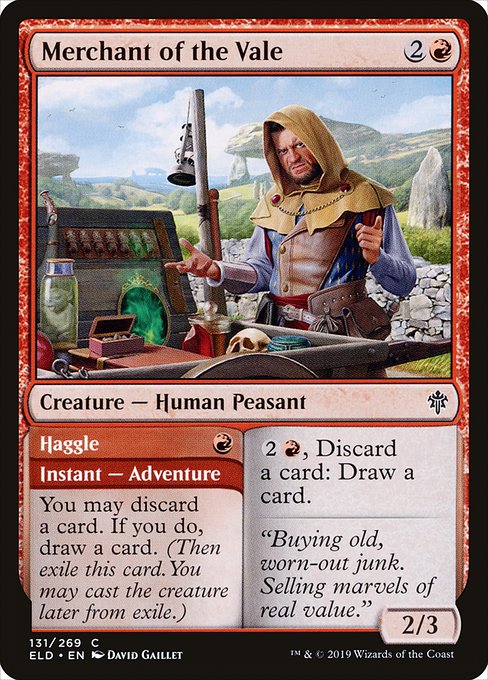
[cards]{{Sagu Wildling}}{{Stormshriek Feral}}{{Merchant of the Vale}}[/cards]
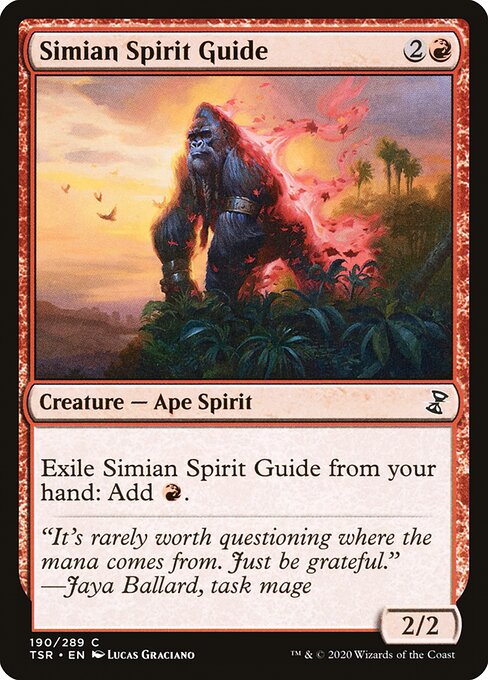
Then there are the modal creatures like [card]Sagu Wildling[/card] and [card]Stormshriek Feral[/card], which technically cost five mana but can be played early using their Omen abilities for card selection or mana fixing. [card]Simian Spirit Guide[/card] plays a crucial role in powering out turn-two cascades, while [card]Merchant of the Vale[/card] helps filter through the deck and fill the graveyard as early as turn one.
The Strategy
The goal of Pauper Living End is simple: cheat massive creatures into play with [card]Exhume[/card] as early as turn two and overwhelm your opponent before they can react. The entire deck is built around making this happen consistently. By running zero cards that cost less than three mana, cascade spells like [card]Demonic Dread[/card] and [card]Violent Outburst[/card] will always find [card]Exhume[/card] when cast.
The deck uses high-mana creatures like [card]Troll of Khazad-dûm[/card], [card]Generous Ent[/card], and [card]Oliphaunt[/card] that have cycling or land-search abilities to fill the graveyard while fixing your mana. You can also filter cards or dig deeper with tools like [card]Merchant of the Vale[/card]. Then, thanks to fast mana sources like [card]Simian Spirit Guide[/card], you’re often able to cast a cascade spell on turn two or three, bringing back a monster your opponent likely can’t handle.
That monster is usually [card]Ulamog's Crusher[/card], an 8/8 with annihilator 2 that can end the game in a couple of swings. But even backup threats like [card]Troll of Khazad-dûm[/card], [card]Avenging Hunter[/card], or [card]Oliphaunt[/card] are enough to finish games quickly. Since every creature in the deck is oversized for Pauper and hard to answer cleanly, reanimating even one is often all it takes. And with more [card]Exhume[/card] or cascade spells to follow, it’s easy to keep the pressure on until your opponent folds.
Once your graveyard has a huge creature or two, you can use fast mana from [card]Simian Spirit Guide[/card] to power out a cascade spell on turn two or three. This leads to a guaranteed [card]Exhume[/card], which brings back a massive threat while your opponent often has nothing to return themselves, especially in Game 1. After that, it’s just a matter of turning big creatures sideways and overwhelming them before they can stabilize.
Optimizing Your Pauper Living End Sideboard
When it comes to building around a powerful combo in Pauper, the main deck usually gets all the attention. But the truth is, no deck can thrive in a competitive meta without a solid sideboard plan. Here are some card choices I’ve taken that fit perfectly for the deck’s game plan.
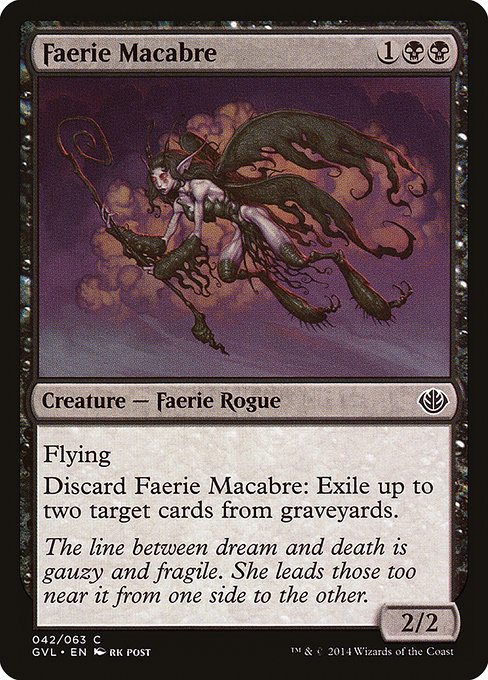
[cards]{{Faerie Macabre}}[/cards]
This is your all-star graveyard hate. It doesn’t require any mana to use and can be activated from your hand at instant speed by simply discarding it. That means it dodges countermagic, doesn't mess with cascade math, and completely shuts down opposing reanimation or graveyard strategies like Familiars or Jund Dredge. It’s essential in any matchup where the opponent also wants to abuse the graveyard.
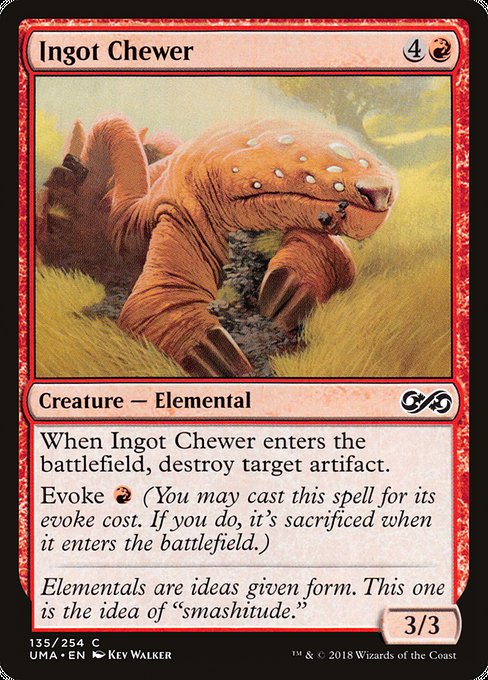
[cards]{{Ingot Chewer}}[/cards]
Grixis Affinity can be a nightmare, but [card]Ingot Chewer[/card] is your secret weapon. With its evoke cost of just one red mana, it bypasses your cascade plan, allowing you to kill artifacts early without adding any sub-three mana cards to the deck. It’s a perfect answer to decks loaded with artifact lands, [card]Prophetic Prism[/card], and big staples like [card]Myr Enforcer[/card].
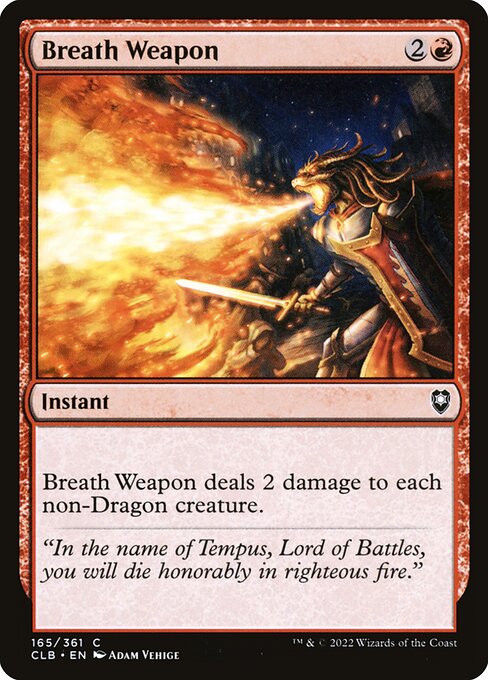
[cards]{{Breath Weapon}}[/cards]
This sweeper is amazing against go-wide strategies like Elves, Faeries, or tokens. It deals 2 damage to every non-Dragon creature at instant speed, which your deck conveniently avoids—because you don’t run any small creatures that would get hit. A well-timed [card]Breath Weapon[/card] can swing the game by wiping your opponent’s board while leaving your giant monsters untouched.
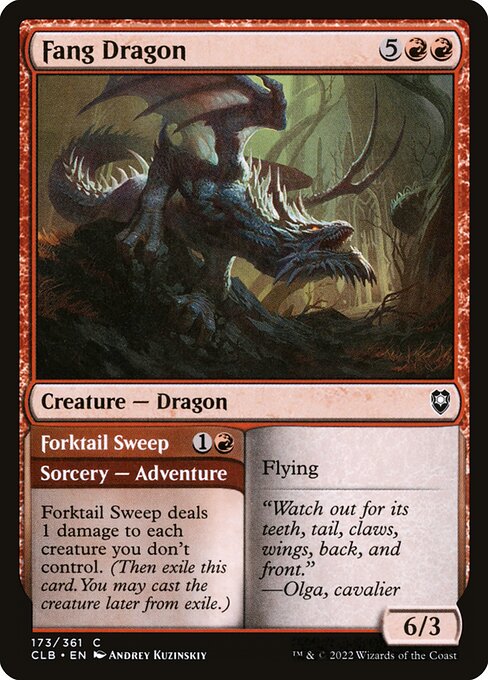
[cards]{{Fang Dragon // Forktail Sweep}}[/cards]
Another flexible sweeper, [card]Forktail Sweep[/card] hits each creature your opponent controls for one damage. That might sound small, but it clears early boards against decks like Mono-Red Burn or Faeries. Later in the game, you can cast the Dragon half, giving you a 6/3 flier to close the game quickly. It’s a removal spell that turns into a threat—a great fit for any grindy matchup.
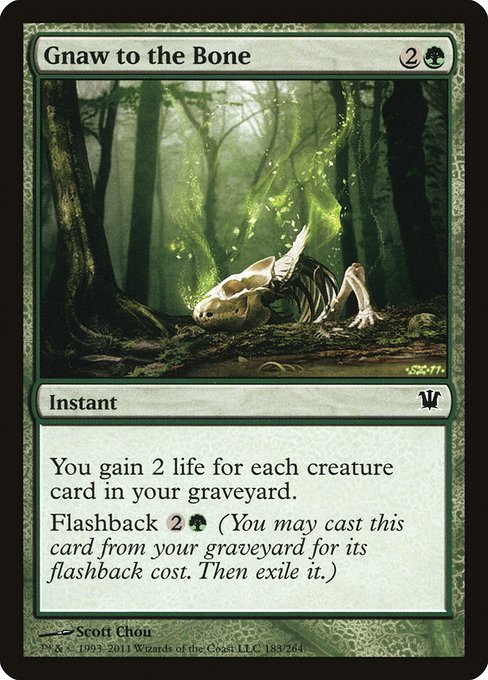
[cards]{{Gnaw to the Bone}}[/cards]
Against Mono-Red Burn and other fast aggro decks, [card]Gnaw to the Bone[/card] can be your lifeline—literally. Since your graveyard fills up with creatures fast, this can often gain you 10–14 life or more, buying you the time you need to stabilize. And with flashback, you get two uses out of it, making it one of your best tools in racing situations.
Tips and Tricks for Playing Pauper Living End in Pauper
Cast [card]Violent Outburst[/card] on your opponent’s turn when possible. Doing it in response to an attack or at the end of their turn gives you a surprise blocker—sometimes turning the tide in combat.
Don’t be afraid to hard-cast your dragons. The green one helps stabilize with life gain, and the red one can apply immediate pressure thanks to haste. In grindy games or when you’re short on graveyard setup, casting them the fair way is often the right play.
[card]Breath Weapon[/card] works one-sided—if you build around it. It deals damage to all non-Dragon creatures, meaning your red and green dragons dodge it completely. You can clear the board and still keep your biggest threats untouched.
Keep a discard outlet or cycler in hand post-sideboard. If your opponent tries to exile your graveyard in response to [card]Exhume[/card], you can cycle a creature or use a looting effect while it’s still on the stack to make sure you have a valid target. Always be ready to pivot if you suspect graveyard hate.
Living End Pauper Sideboard Guide
The following are suggestions on how to approach games with the deck, though they clearly reflect my own preferences based on my personal experience with the deck, so you’ll notice some different recommendations here than what you might be used to.
Mono Red Aggro
IN: 2 [card]Breath Weapon[/card], 3 [card]Gnaw to the Bone[/card]
OUT: 4 [card]Avenging Hunter[/card], 1 [card]Demonic Dread[/card]
Against Mono-Red Burn, the race is on—and that means buying yourself time is key. Bring in 2 copies of [card]Breath Weapon[/card] to clear out their early board and 3 [card]Gnaw to the Bone[/card] to gain massive chunks of life from your creature-filled graveyard. Cut 4 [card]Avenging Hunter[/card], which is too slow here, and 1 [card]Demonic Dread[/card] to make room.
Grixis Affinity
IN: 3 [card]Ingot Chewer[/card]
OUT: 2 [card]Demonic Dread[/card], 1 [card]Avenging Hunter[/card]
Grixis Affinity’s artifact synergy makes [card]Ingot Chewer[/card] a must. Evoking it for one mana won’t mess with your cascade math, and it can take out important pieces like artifact lands or enablers. You don’t need all your cascade redundancy here, so trim 2 [card]Demonic Dread[/card] and one [card]Avenging Hunter[/card]—they’re slower and less effective in this matchup.
Dimir Faeries
IN: 2 [card]Breath Weapon[/card], 3 [card]Fang Dragon[/card]
OUT: 4 [card]Avenging Hunter[/card], 1 [card]Demonic Dread[/card]
Dimir Faeries is all about controlling the air. Bring in 2 [card]Breath Weapon[/card] and 3 [card]Fang Dragon[/card] to help wipe their board and gain tempo. [card]Fang Dragon[/card] can be hard-cast later as a finisher, but its adventure mode is what really shines here.
Dimir Terror
IN: 4 [card]Faerie Macabre[/card]
OUT: 2 [card]Demonic Dread[/card], 2 [card]Avenging Hunter[/card]
Graveyard interaction is everything against Dimir Terror. Bring in 4 [card]Faerie Macabre[/card] to pick off key creatures from their graveyard before they can become threats if you cast your [card]Exhume[/card]. This is a hard match though as in game one is easy for them to mill incidentally one of their big creatures so [card]Exhume[/card] will backfire, plus, they pack very efficient removal in [card]Cast Down[/card] and [card]Snuff Out[/card].
Gameplay Video
Wrap Up
If you’d like to support the blog and my YouTube channel, you can do so for just $1 a month on Ko-fi or through YouTube memberships. That gets you access to our Discord community and behind-the-scenes content — and it helps me keep creating more Pauper content for you all.
My Favorite Pauper Setup
Here are some of my favorite MTG products for Pauper—stuff I’ve tried, loved, and think you'll find super useful too.


The Amazon links use affiliate codes that help support future content if you grab something.
.jpg)

.jpg)
.jpg)
.png)
.png)
.webp)
.webp)
.jpg)
I tried this deck to the great joy and hatred of my opponents but found 2 obstacles that I could not handle properly (excluding a Mono Blue Delver).
ReplyDeleteHow can I bargain Chrysalis and Boogles ?
I was thinking of an "Extract a Confession" but it would break the cascade mechanics.
Any advice ?
Thanks again for the list